The Ultimate Guide to Walnut Wood Finishes: Tips for a Stunning Finish
15th Feb 2025

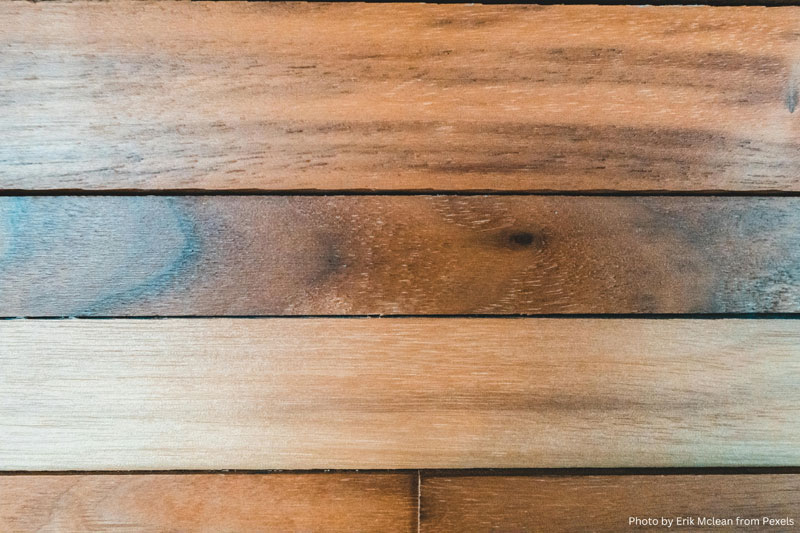
Walnut wood, with its rich tones and distinctive grain patterns, is a masterpiece waiting to be revealed. However, to truly unlock its potential, more than just a quality slab is needed. The proper finishing techniques can elevate walnut's natural beauty, providing both aesthetic enhancement and long-term protection. Understanding and applying various woodworking finishes with precision can transform raw walnut lumber into a stunning work of art.
Why Walnut Wood Requires Special Attention
Walnut's versatility is one of its most exciting qualities. Its unique characteristics necessitate thoughtful finishing techniques, but the finish applied can either enhance or diminish the wood's natural beauty. This versatility allows for a wide range of finishing options, each with the potential to bring out the best in your walnut wood.
- Rich and Distinctive Grain – Walnut's grain patterns create visual depth, which can be emphasized or softened depending on the finish.
- Color Variations – Ranging from light brown to deep chocolate hues, walnut tones can be unified or highlighted with stains and sealers.
- Density – As a hardwood, walnut accepts a variety of finishes, but its density means that specific techniques, such as grain filling, may be required for a smooth final result.
Understanding these factors is essential for selecting the best finishing method to achieve a flawless look.
Preparing Your Walnut Lumber for Finishing
Proper preparation is the key to a successful finish. It ensures that the finish adheres well and enhances the wood's natural beauty. Skipping these steps can lead to uneven absorption, dullness, or imperfections in the final result. By understanding and following these steps, you can be fully prepared for the task of finishing your walnut lumber.
- Sanding – Begin with coarse sandpaper (around 80 grit) to remove rough patches and imperfections. Gradually move to finer grits (up to 220) for a smooth surface.
- Cleaning – Wipe down the wood with a clean, damp cloth to remove all dust particles, as any residue left behind can interfere with adhesion.
- Grain Filling – Walnut has open pores, so using a grain filler can help create a more uniform finish, especially if opting for a high-gloss or polished look.
Choosing the Right Finishing Products
Choosing the right finish for your walnut wood is a critical decision. It depends on your desired aesthetic, durability requirements, and application preferences. Each type of finish offers unique benefits, so it's important to consider these factors when making your selection.
Natural Oils
For a warm, hand-rubbed finish that enhances the wood's natural tones:
- Linseed Oil – Provides a classic, deep glow but requires multiple coats and periodic maintenance.
- Tung Oil – More durable and water-resistant than linseed oil, making it an excellent choice for high-use furniture.
Varnishes and Lacquers
For enhanced protection and a polished appearance:
- Varnish – Creates a tough, scratch-resistant surface that preserves the wood's integrity.
- Lacquer – Fast-drying and available in multiple sheen levels, offering a sleek, professional finish.
Stains and Sealers
For color enhancement and added protection:
- Oil-Based Stains – Penetrate deeply, enriching the natural grain and providing a rich, lasting hue.
- Water-Based Stains – Offer a faster drying time and low odor but may require additional sanding to minimize grain raising.
Applying Wood Finishes Like a Pro
To achieve an even, professional-quality finish, follow these steps:
- Ensure a Clean Surface – Remove all dust and oils to prevent imperfections.
- Test the Finish First – Always test on a walnut offcut to preview the final result before applying it to the main project.
- Apply Thin Coats – Whether using oil, stain, or varnish, multiple thin layers yield a smoother, more durable finish than a single thick coat.
- Sand Between Coats – Use fine-grit sandpaper (around 320 grit) to maintain a smooth texture between applications.
- Allow Proper Drying Time – Each coat should fully dry before adding the next to ensure optimal adhesion and longevity.
Tips for Achieving a Professional Finish
For superior results, keep these expert tips in mind:
- Control Temperature and Humidity – Extreme heat or moisture can affect drying times and the overall finish quality.
- Choose the Right Application Tool – Rags work best for oils, while brushes provide better control for varnishes and stains.
- Final Buffing – Once thoroughly dried, a light buffing with a lint-free cloth enhances the finish's sheen and smoothness.
Enhancing Woodworking Projects with Walnut Finishes
Walnut's natural elegance makes it a preferred choice for furniture, decorative pieces, and even musical instruments. The right finish not only protects the wood but also enriches its color and depth, adding sophistication and character to any project.
- Furniture Making – Walnut remains a top choice for furniture due to its durability and workability. A well-applied finish ensures longevity and highlights its luxurious grain.
- Lutherie – Luthiers favor walnut for its acoustic properties, and proper finishing enhances its appearance and tonal qualities.
Elevate Your Walnut Wood Projects with Expertise
Achieving the perfect walnut wood finish requires knowledge, precision, and high-quality materials. At Global Wood Source, we provide premium walnut lumber and expert guidance to support your woodworking journey. Whether you are a professional craftsman or an enthusiastic hobbyist, our selection and expertise will help bring your vision to life.
Explore our offerings and take your woodworking projects to the next level with precision and passion. At Global Wood Source, we believe in the art of perfection—visit our site today to discover a world of possibilities in woodworking finishes and beyond!

